HOMEBIOGRAPHY RESUMEDESIGN TEAMS FAVE LINKS

Tuesday, May 14, 2013

May 123 Challenge

Hello and welcome to my blog today.
I'm here to share a 'happy' layout and one that is 
quiet devoid of my usual mad, bright, background!
But I like it all the same, quiet a refreshing change and it all came together so 
quickly and easily at the recent 'Crop For A Cause' I attended.

This page is for the May challenge at the 123 challenge blog.
The criteria this month being:-

* Our colour = Red
* Our Word = Happy
* Our Technique = Balloons

My balloons are these Flair buttons from A Piece of Cake Designs.
Although this layout is simple compared to some of mine, I did manage to add some texture paste along with a woodgrain stencil from Prima.
I've added Red in the buttons, washi tape border, and stars. 
The word 'Happy' is there on the patterned paper.


I also added some real balloons- well just part of some real balloons!
I cut off the knotted end and added them under these wooden Prima embellishments.

Thanks so much for stopping by my blog.

Photobucket

Sunday, May 12, 2013

May- Kraft It Up

Happy Mothers Day to all the Mothers. 
I hope your day is special in some small way. 

Being Mothers Day, I thought this was an appropriate layout to share. A very special Mother 
to five children and seventeen grandchildren.
I've Scrapped a lovely picture of my late, dear Grandmother as a pretty young woman.


This is my layout for Kraft It Up for the month of May.
May is the month of VINTAGE at Kraft It Up!!!!
I guess this is as vintage as I could make it.  I'm calling it 'vintage with a modern, minimalist (for me) twist.' 
I used some techniques and embellishments from the Finnabair class I attended in March.
 I used a crafters workshop stencil and texture paste. Then added colour with distress inks and Artists Pigments by LuminArte - love the gorgeous rich colours you get with these pigments.
I added the lace and plenty of distressing to add to the vintage feel of the layout.
The mostly metal emballishments, are coloured with acrylic paints and more of the LuminArte pigments.

Thank you all for stopping by my blog.

Photobucket

Friday, May 10, 2013

Awesome New Blog Design by Em Stafrace

Hello I'm so excited to share not just a super fun page with you today but also 
my brand new revamped blog!!!
How fantastic does it look?  I'm so happy with how it's been designed.
Em Stafrace is just the most amazing digital designer, she's created something that is so fun and unique and I'm totally in love with it.
I've yet to update the new page tabs at the top but I'll get to them asap.
Thank you so much Em it's just gorgeous. :) xx


Ok onto the layout I created for the Scrap the Boys May challenge.


The challenge is to:-

CREATE A GRUNGEY/ARTY/MESSY LAYOUT, INSPIRATION IS TOTALLY UP TO YOU!!!
Totally my kind of challenge I love doing layouts like this.
 I chose my photo and knew I wanted to use bright colours with it but also plenty of white 
and black so I just went for it, no planning involved, just random spraying, stamping and doodling until I was happing with the base. 
I layered up some papers and stickers from American Crafts by Amy Tangerine and it was done.


Thanks so much for stopping by my blog, hope you like my take on the Scrap The Boys challenge and the new look blog!

Em's business blog 'Little by Little - Redesigning the Bloggersphere' is here and her personal
blog 'Just a Girl With Ideas' is here. Please go visit you wont be disappointed.
To celebrate the new look blog I'll be having a great giveaway in the next week or so, so 
make sure you check back here.
:)

Photobucket


Tuesday, May 7, 2013

Masters Challenge - Stampin' Up


Hi I thought I might pop in and start sharing the layouts I've created for
As part of our Masters tasks each month we are sent some products 
from the sponsors and set a task.  
Our first task was to create a single layout using Stampin' Up Products.

This is my layout with pictures of Me! Taken a very long time ago!


I used the Stampin Up inks to cover my background paper (also by Stampin' Up)
Then I spritzed and flicked water on it to get the droplet effects.
Then I stamped with the cute little Stampin' Up kitten stamp in a random fashion over the base.


I made these paper flowers from Stampin' Up papers and added one of their resin flowers to the centre.

Thanks for stoping by and thanks so much for the comments your leave.
Cheers, 
Leonie xo

Saturday, May 4, 2013

SUYS _ May

Hello, and welcome to my Show Us Your Stuff May layout.
Our challenge this month is to create a layout using texture paste on your page, along with
some type of handmade embellishment.


I used this lovely Prima stencil with texture paste. Once it was dry I used Faber Castell Gelatos 
to colour the flowers and outlined them with Pitt Artist Pens.
I also used some Gelatos to colour the cardstock behind my photographs


My handmade element are two Cherry Flairs badges from A Piece of Cake Designs.


Hope you can join us this month at SUYS,
Cheers.

Wednesday, May 1, 2013

Scrap Around the World - Exciting New Challenge!!!!

Hello around welcome to my first post for May and it's an exciting announcement about a brand new Scrappy Challenge called 

Helen Tilbury from South Africa has put together an amazingly talented group of scrapbookers to form the Design Team and I feel very humbled to be among them.  Thank you Helen. 
Here's some of what Helen has to say about this exciting new scrappy challenge.


"We are a group of 14 women from all around the globe, of different ages, cultures & circumstances, united by our love of scrapbooking!  It is a universal language that we all understand!!

That's why I chose the name 'Scrap Around the World', because, literally, that is what we are all doing :)

Will you join us on our journey every month?  I do hope so!

We are on the look out for players to take part in our challenges & make it a roaring success & followers to support us & encourage sponsorship so please join our blog & follow us officially!"  


♥♥♥♥♥♥♥♥♥♥♥♥♥♥

May 2013 Challenge 1

Each month we will present you with a mood board & a sketch, together with a mood board/sketch combo image for you to save to your computer & upload to your blog when taking part in our challenges.  

This month we have Agnieszka Bellaidea to thank for this gorgeous mood board!


All you need to do is be inspired by the mood board (in ANY way) 
& use our sketch as your starting point.  


mood board/sketch combo


**** the above image MUST appear on the blog post containing your challenge entry please****

You also need to mention that you are playing along with the current challenge at Scrap Around The World & link up to it please :)


♥♥♥♥♥♥♥♥♥♥♥♥♥♥


So, this is my DT layout for our first Challenge.


I stuck fairly closely to the sketch as you can see.
Using the 'Basecoat' range from Kaisercraft, I distressed and inked my base with water, distress inks
and texture stamps.
I found the rusted orange tone appealing on this gorgeous mood board.   

 The lace table cloth and lattice work of the doors in the mood board inspired the lace-type stencil work behind my photos & cluster.
If you're an Aussie Rules fan I'm sure you're familiar with my title and heard it sung by Mike Brady, in a certain song about VFL legend Roy Cazaly.

Loving my flair buttons at the moment this one is by 'Finding Nana' and the other I used on this layout 
is from 'A Flair for Buttons'

I've got some information below about the prizes that are up for grabs for our first challenge
at SCRAP AROUND THE WORLD.  I'm sure you'll agree they are pretty
awesome!!

.............................

Our challenges are open to everyone, anywhere in the world & all this month's prizes include
FREE INTERNATIONAL SHIPPING!!

This month our merit winner will receive the newest collection from


2nd place will receive the brand new collection from 13 arts


3rd place will receive a $25 chipboard prize-pack from
Scrapmatts Chipboard in Australia,
containing a selection of their latest releases!


4th place will receive two sets of flowers from


Our RANDOM winner will receive this assorted pack of goodies.


Please head on over to the Scrap Around the World blog to see all the Amazing DT layouts.

The deadline for this challenge is midnight EST Saturday 25th May 2013.

Please link your entries into our sidebar using our Inlinkz tool & don't forget to read our RULES OF PLAY before you begin.

Please play along - our success depends on YOU!

Cheers, Leonie xo


Sunday, April 28, 2013

Scrap The Boys - April

Hi, 
I've been playing with dylusions sprays again. 
Fun times.  
This time it's for the current sketch at Scrap the boys.


I teamed it up with the beautiful paper range from Glitz - Color Me Happy.
Cheers, Leonie

Wednesday, April 24, 2013

The Scrapbook Store - April Sketch

It's been ages since I did one of the sketches at The Scrapbook Store but I thought
since I was inspired to create this background by one of their designers, the extremely talented Kim Price, then it was appropriate I also used this page to scrap The Scrapbook Stores' April sketch.
Here's my layout.

I used The Crafters Workshop 12x12 confetti stencil by Rhonda Palazzari to first add some texture with modelling paste.  Once I'd finished spraying with dylusions inks I then placed the stencil back over the modelling paste and used a paint dauber to add the bright pop of red.  
I like that it's not perfect coverage and you can see some of the white paste still on the edges. 


If you haven't seen Kim's work pop over here to check out some of the awesome layouts 
she creates.  Kim creates some super backgrounds on her layouts using dylusions inks - my favourite!
  so when she did a tutorial over here using these fabulous sprays I had to give it a whirl.
So cool watching the ink react with the water and blend with the other colours.


And here's a close up of my Journalling.
I scrapped this gorgeous picture of my eldest son on Geelong's waterfront 
staring off into space daydreaming.
So I used a line from  Adele's song 'Daydreamer'


Thanks for stopping by my blog and make sure you're back on the 1st of May I have some super exciting news to share with you all!
Cheers,
Leonie.


Thursday, April 18, 2013

My Last Post on the 2Crafty Blog.


Hello Bloggers, I'd just like to share a few layouts that made up my last post on the 2Crafty Chipboard blog.  Here's the post that went up earlier this month. 

.................................


Hello 2Crafty fans. Welcome to my last share on the 
2Crafty Chipboard Design Team.
Thank you so much to Vanessa, Di and all the DT girls,
 I've been privileged to work with over the past nine months.
 The constant inspiration has been just amazing, so thank you very much. :)

My first share today is using lots and lots of cogs and a picture of my eldest Son.


I used these cute cogs and these gears there is also a large section 
of the cog border in amongst all the gears. I painted them various 
colours using paint daubers and then doodled on them with a white gel pen.
 

I used the 'In the Blink Of An Eye' title painted black and raised off the 
page with some foam adhesive and some more cogs behind it. 


I also used these directional hand tags
 'Yesterday, Today and Tomorrow' 
 as subheadings for my journalling. 


My second layout captures my second son on a peaceful early 
morning run along the beach.


I used the 'Lifes Journey' title and dabbed on some texture paste and 
then swiped the raised texture with a paint dauber before finally 
outlining it with a coloured pen.


I also used one of these lovely chipboard birds in flight on this
 layout using the same technique as for the title.

And the third piece of chipboard I used on this layout were these lovely swirls.
I thought they evoked a quite a nice beachy feel of waves rolling onto the shore.
So perfect for this layout.


And my final layout is a picture of our new puppy who is just the
 cutest thing ever. She has quickly found her way into our hearts forever. 
I used the one of the Tiny Henri frames and the two of the
 Tiny Kathleen frames on this layout.
Painting them with paint Daubers again and then using them to
 place parts of my title.


Thanks so much for your generous and lovely comments on my
 posts here at 2crafty Chipboard.
It's been an absolute pleasure to share my creations using 
2 Crafty Chipboard and I hope I've inspired 
you in some way to get creative with your chipboard.

Cheers, 
Leonie Neal-Dawson.

Friday, April 12, 2013

Sharing my Masters Entries - Part 4

Hi I'm here to share my final project for my masters entry. A little later than I intended but I've been off enjoying some time with the family on a little camping adventure.
So the last project was to scrap a Double layout that reflects on your childhood.  I very rarely scrap doubles these days like never! So I was a little apprehensive approaching this one but was very happy with the end result.   
Thankfully my mum loves photo's and managed to capture many, many photo's of myself and my three sisters growing up.  Mum has scanned all of her old slides so they were all in digital format ready for me to edit and print however I wished. 
So I wasn't stuck with only a couple of pictures to choose from but rather hundreds,  which proved a problem in itself.  I had trouble narrowing it down to just a few photo's, so what did I end up doing?  Well I put at least ninety photo's on my double!
Here's the end result. 

I didn't try to add that many photo's from the start it sort of just happened!
I drew a few sketches of potential layouts and then played around with a lot of photo's that I already had printed just to see what they looked like.
Here are a few options I tried


You can see the final design starting to take shape about here.
But the larger photo's weren't really making much of an impact.
That's when I decided to make the smaller photo's black and white and leave the larger pictures coloured.

I created a collage in Picasa and printed the photo's on 6x4 photo paper so each of the smaller pics is about 2.5 x 3.5cm 
Sorry about the blurry iphone pic! 
It took forever to cut them all up and them lay them out. 

And I went through the process of laying them all out several times.  The first time I wasn't happy with the background (below) so it was back to the drawing board.

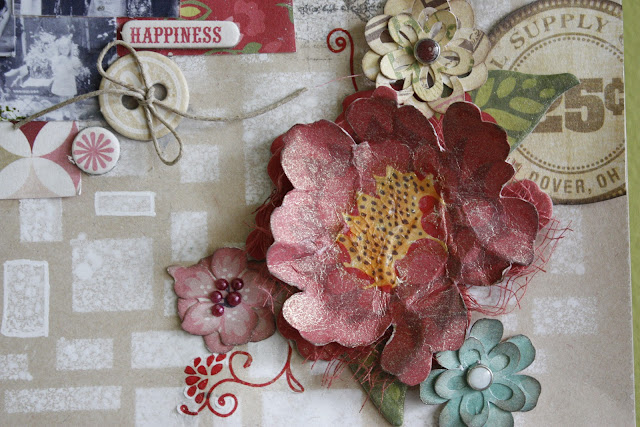
I used the Crafters Workshop cubist stencil because all the squares reflected the look I was trying to achieve with all the photo's.
  I was much happier with this background, using white Mister Huey's ink spray.

Then it was just he journalling and embellishing.


I fussy cut and layered flowers from an Echo Park paper range and also cut some flowers and layered them with the Cricut machine.

Gauze, liquid pearls and some brads, to finish things off.

Oh and texture stamps around the edges of the photo collages.  I also raised the main photo's with chipboard and foam tape to make more of an impact.


So there you have it, all my masters projects. I packaged them all up and posted them off.  Fingers crossed and hoping but not really expecting anything. 

What a wonderful year it's been so far, receiving THAT phone call (or in my case making that call, because I missed the first one and answered a message left on my phone).  LOL.  The amazing amount of prizes and meeting and getting to know more fabulous people in this industry. 
A huge thanks to Scrapbooking Memories magazine and it's editors for holding this annual competition and all the very generous sponsors.  
I feel very luck and blessed.
Cheers,
Leonie.