HOMEBIOGRAPHY RESUMEDESIGN TEAMS FAVE LINKS

Sunday, April 28, 2013

Scrap The Boys - April

Hi, 
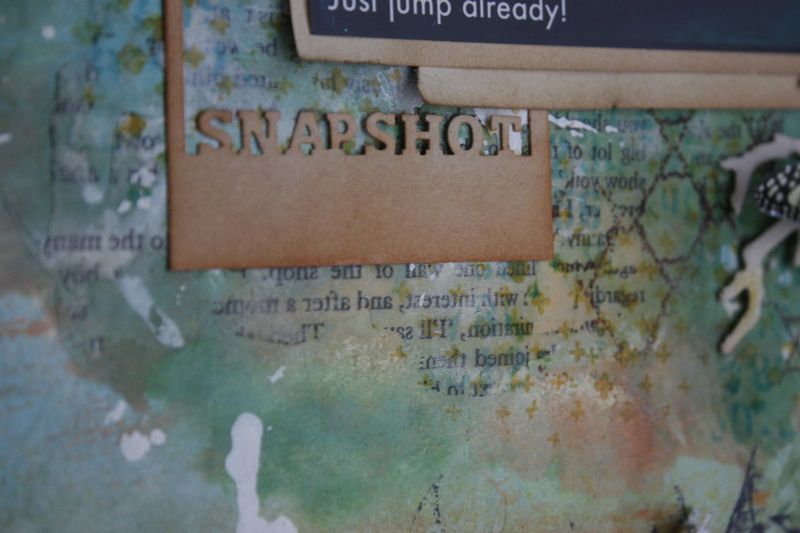
I've been playing with dylusions sprays again. 
Fun times.  
This time it's for the current sketch at Scrap the boys.


I teamed it up with the beautiful paper range from Glitz - Color Me Happy.
Cheers, Leonie

Wednesday, April 24, 2013

The Scrapbook Store - April Sketch

It's been ages since I did one of the sketches at The Scrapbook Store but I thought
since I was inspired to create this background by one of their designers, the extremely talented Kim Price, then it was appropriate I also used this page to scrap The Scrapbook Stores' April sketch.
Here's my layout.

I used The Crafters Workshop 12x12 confetti stencil by Rhonda Palazzari to first add some texture with modelling paste.  Once I'd finished spraying with dylusions inks I then placed the stencil back over the modelling paste and used a paint dauber to add the bright pop of red.  
I like that it's not perfect coverage and you can see some of the white paste still on the edges. 


If you haven't seen Kim's work pop over here to check out some of the awesome layouts 
she creates.  Kim creates some super backgrounds on her layouts using dylusions inks - my favourite!
  so when she did a tutorial over here using these fabulous sprays I had to give it a whirl.
So cool watching the ink react with the water and blend with the other colours.


And here's a close up of my Journalling.
I scrapped this gorgeous picture of my eldest son on Geelong's waterfront 
staring off into space daydreaming.
So I used a line from  Adele's song 'Daydreamer'


Thanks for stopping by my blog and make sure you're back on the 1st of May I have some super exciting news to share with you all!
Cheers,
Leonie.


Thursday, April 18, 2013

My Last Post on the 2Crafty Blog.


Hello Bloggers, I'd just like to share a few layouts that made up my last post on the 2Crafty Chipboard blog.  Here's the post that went up earlier this month. 

.................................


Hello 2Crafty fans. Welcome to my last share on the 
2Crafty Chipboard Design Team.
Thank you so much to Vanessa, Di and all the DT girls,
 I've been privileged to work with over the past nine months.
 The constant inspiration has been just amazing, so thank you very much. :)

My first share today is using lots and lots of cogs and a picture of my eldest Son.


I used these cute cogs and these gears there is also a large section 
of the cog border in amongst all the gears. I painted them various 
colours using paint daubers and then doodled on them with a white gel pen.
 

I used the 'In the Blink Of An Eye' title painted black and raised off the 
page with some foam adhesive and some more cogs behind it. 


I also used these directional hand tags
 'Yesterday, Today and Tomorrow' 
 as subheadings for my journalling. 


My second layout captures my second son on a peaceful early 
morning run along the beach.


I used the 'Lifes Journey' title and dabbed on some texture paste and 
then swiped the raised texture with a paint dauber before finally 
outlining it with a coloured pen.


I also used one of these lovely chipboard birds in flight on this
 layout using the same technique as for the title.

And the third piece of chipboard I used on this layout were these lovely swirls.
I thought they evoked a quite a nice beachy feel of waves rolling onto the shore.
So perfect for this layout.


And my final layout is a picture of our new puppy who is just the
 cutest thing ever. She has quickly found her way into our hearts forever. 
I used the one of the Tiny Henri frames and the two of the
 Tiny Kathleen frames on this layout.
Painting them with paint Daubers again and then using them to
 place parts of my title.


Thanks so much for your generous and lovely comments on my
 posts here at 2crafty Chipboard.
It's been an absolute pleasure to share my creations using 
2 Crafty Chipboard and I hope I've inspired 
you in some way to get creative with your chipboard.

Cheers, 
Leonie Neal-Dawson.

Friday, April 12, 2013

Sharing my Masters Entries - Part 4

Hi I'm here to share my final project for my masters entry. A little later than I intended but I've been off enjoying some time with the family on a little camping adventure.
So the last project was to scrap a Double layout that reflects on your childhood.  I very rarely scrap doubles these days like never! So I was a little apprehensive approaching this one but was very happy with the end result.   
Thankfully my mum loves photo's and managed to capture many, many photo's of myself and my three sisters growing up.  Mum has scanned all of her old slides so they were all in digital format ready for me to edit and print however I wished. 
So I wasn't stuck with only a couple of pictures to choose from but rather hundreds,  which proved a problem in itself.  I had trouble narrowing it down to just a few photo's, so what did I end up doing?  Well I put at least ninety photo's on my double!
Here's the end result. 

I didn't try to add that many photo's from the start it sort of just happened!
I drew a few sketches of potential layouts and then played around with a lot of photo's that I already had printed just to see what they looked like.
Here are a few options I tried


You can see the final design starting to take shape about here.
But the larger photo's weren't really making much of an impact.
That's when I decided to make the smaller photo's black and white and leave the larger pictures coloured.

I created a collage in Picasa and printed the photo's on 6x4 photo paper so each of the smaller pics is about 2.5 x 3.5cm 
Sorry about the blurry iphone pic! 
It took forever to cut them all up and them lay them out. 

And I went through the process of laying them all out several times.  The first time I wasn't happy with the background (below) so it was back to the drawing board.

I used the Crafters Workshop cubist stencil because all the squares reflected the look I was trying to achieve with all the photo's.
  I was much happier with this background, using white Mister Huey's ink spray.

Then it was just he journalling and embellishing.


I fussy cut and layered flowers from an Echo Park paper range and also cut some flowers and layered them with the Cricut machine.

Gauze, liquid pearls and some brads, to finish things off.

Oh and texture stamps around the edges of the photo collages.  I also raised the main photo's with chipboard and foam tape to make more of an impact.


So there you have it, all my masters projects. I packaged them all up and posted them off.  Fingers crossed and hoping but not really expecting anything. 

What a wonderful year it's been so far, receiving THAT phone call (or in my case making that call, because I missed the first one and answered a message left on my phone).  LOL.  The amazing amount of prizes and meeting and getting to know more fabulous people in this industry. 
A huge thanks to Scrapbooking Memories magazine and it's editors for holding this annual competition and all the very generous sponsors.  
I feel very luck and blessed.
Cheers,
Leonie.


Wednesday, April 3, 2013

Scrap for Help - April Challenge.


 Hello and welcome to April! 
I want to share a page I scrapped for the April challenge over at the Scrap For Help Blog 
Here's this months challenge.

.........................
"Book pages!!!!  What a fun recycled material to use on a project, So many uses.

A fun one for sure!!!
You can use any kind of recycled book pages for this challenge.

You can use old dictionaries, maps, atlas' Old books of any kind, ....Just think outside the box and create a page using this material.

You can include it on your work as is, or think of a clever way to incorporate it some how-

You might want to stamp on it.
Paper piece it
Punch it
emboss it
Paint on it
fold it
I could go on and on!!!!

You are only limited by your creative imagination!!!!"
........................

This is the page I created.


I used book pages in three different ways.
Firstly I used an image transfer technique on the background.
Which was quite fun as I'd never tried it before so it was all trial and error.
Yes I knew the text would all come out back to front lol, but I was more interested in trying out the 
technique. 
I also used book pages to matt my photo on aswell.

And the third way was to make these flowers I cut using a die and the bigshot.
Then sprayed them with ink.

Thanks for stopping by and I hope you can pop over to the Scrap for help blog to check out the other DT examples for a whole load of inspiring projects. 
Cheers,
Leonie.

Friday, March 29, 2013

Sharing my Masters entries - part 3


Hello, lovely blog readers. I'm back today to share part three of my masters entry.
The directive for this was to create a 'single layout using 3 or more photo's, journalling and more than one piece of memorabilia.'
Well I must say that or all the projects we had to do this is the one that had me stumped for along time.
I must have spent close to two weeks from planning this until the page was complete to my satisfaction.
I think I even left it for a few days and made a start on the double layout because I was becoming so frustrated with it.

I seemed to get stuck at every stage with this one from photo selection and placement to the memorabilia component and paper selection. 

Here are some pictures showing the various decisions I went through.
Lots of paper shuffling went on here!!
Wasn't happy with four photo's it just didn't sit well with me.


Then I added a fifth photo but it still wasn't right! 


Different papers again and different photo's!!
I actually spent ages using various inks and techniques on this
piece of paper but ended up using only a very small portion of it. 
Always the way hey?!

At least I was happy with these particular photo's, things were slowly coming together!
I had a bit of trouble getting the colour right in editing my photos. Mums photo was 
only in Black and White and I wanted just a touch of colour to match the others 
so in the end I printed it out and then used Tim Holtz distress inks to hand tint the 
bouquet she's holding.


Different papers yet Again!! Man, this was frustrating!
Too much grey though, don't you think?!


I did have most of my embellishments sorted at least.
These comprised the memorabilia component of my layout.
When I asked my Mum if she would let me cut a few snippets from her bridal bouquet and head piece, 
I was expecting a 'no' but as she said 'It's been in the cupboard for fifty years and she wasn't likely to wear it again!!' Thanks Mum. :)
My Mum also has her mothers wedding gown which although once a beautiful gown 
unfortunately hasn't stood the test of time.  
I guess being close to ninety years old it's not surprising really.
So I cut several of the fabric buttons from my Grandmothers gown to add to the memorabilia.
Fortunately I have some left over fabric so I didn't have to cut into my own wedding gown.
I used some of this to make some Yoyo flowers.

This is a pic of me using steam to try and bring back some life to the flowers from Mum's bouquet.
That and some liquid pearls worked a treat. 

So after much to-ing and fro-ing I finally came up with these papers and added lots of stamping, machine stitching and coloured texture paste.

I used this cute little Kraft envelope for my journalling and tucked it behind the photo square which was raised using chipboard.

You can get some idea of the dimension in this picture.

So there you have the third instalment, a little later posting than I'd anticipatied!
Next and last up is the Double, hopefully within the next week. 
Cheers. :)

Tuesday, March 26, 2013

123 March Challenge

I can't believe it but I'm still catching up posting pages I scrapped at retreat at the start of the month!  Life is fairly crazy right now!! This school term has been choc full of activities during and after school or maybe it's just that it's a shorter term?!  
Anyhow I'm really looking forward to a two week break over Easter.
Here's a page I made for the 123 challenge blog which was relaunched this month.
The criteria was to use 'Black' the word 'year' and 'twine circles'.


And another from Retreat -a 'just because' page (wish I had time to do a few more of these at the moment!).


Using the March kit from 'A Piece of Cake Designs', I love that Maggie Holmes script paper!


The background was made using Tim Holtz distress inks and Dylusions white mist (I'm in love with that stuff!). 

Ok that's it for now, I owe a lot of people blog visits and i'm trying to get to them all.
Thank you so much for visiting. It makes me happy to read 
all your kind words and comments. :)
Cheers.


Friday, March 22, 2013

ScrapFriends March Sketch

Hello, I'm sharing a layout today that I did a couple of weeks ago at retreat for the
  ScrapFriends March sketch.
I actually made the background quite a while ago while I was playing around with a mix of Dylusions sprays and Mister Hueys calico cream mist.  I put it aside for a bit and then when I got the March kit from 'A Piece of Cake Designs' I new this background would be a perfect match with the papers and embellishments in the kit.
Here's my layout.


And the super sketch from Scrapfriends. I've turned the two photo's into one larger 5x5" photo.


A couple of close ups of the embellishment clusters. 


I punched some butterflies out of the gorgeous glitter tape from the kit.  

Thanks for popping in to take a look at my blog. :)
Enjoy your weekend. 
Cheers. 

Sunday, March 17, 2013

Jasmines' Distress Ink Watercolour background.

Two weeks ago at the 'Scrap and Chat' Retreat I sat next to a super
scrappy lady, Jasmine Shea.  Her layouts are always so unique, she is one very talented scrapbooker.
So I completely made the most of her expertise and got her to give me a step by step on how she creates 
her watercoloured backgrounds using distress inks.  
Jasmine actually has a 'how to' tutorial up on the Scrapfriends blog here if you want to give it a try for yourself. 
Here's the layout I created.

Scrapping a picture of our late dear cat Percy.


No patterned papers just some gauze under my photo and a few little embellishments.  
The satin flowers from Tiddlypeep Designs were a 
gift in our retreat goodie bag, perfect colour match for my page.


So now I've had a 'how to' lesson I'll definitely be trying this technique again! ;)


Lastly, I just want to say a huge thankyou to Linda, Jan and Sandra for each awarding me with the 
Leibster blog award.  Three in one week!! Thank you so much, I really appreciate it and feel very honoured.  It's very gratifying to know that there are bloggers out there who like and appreciate the work I put up here.  I really encourage you to check out their blogs and take a look at their work. Thanks so much to all my readers.  

cheers, 
Leonie.


Wednesday, March 13, 2013

Sharing my Masters Entries - Part 2

Hi, how are all my blog friends?  I'm here today to share my second masters project and I have lots of close up pictures to show you.  I was so happy with how this canvas turned out and it was definitely a lot of fun to create and that's what it's all about it isn't it?
The Criteria for this project asked you 'Create a 12x12 canvas and to think about how you can add textures using mediums, paint, fabric etc'
This was my entry-


My whole inspiration for this for canvas came from a poem by Nan Whitcomb that I have loved since I was a teenager. 
Here's the poem.

 Poem by Nan Witcomb
(The thoughts of Nanushka)

Johnny's got a pocketful of dreams -
it's patched and there are cakecrumbs in the seams -
to you it may not be a lot
but all the treasure Johnny's got,
he carries in his pocketful of dreams -
a beetle in a match box, a tiny piece of string,
some sealing wax and carpet tacks,
a bell that doesn't ring -
When Johnny grows to be a man,
into a world that's tough,
he'll soon be told his pocketful of dreams
won't be enough -
but if he owns a great big car,
a swimming pool and a yacht,
he'll never be as happy
as the time when all he's got
is a beetle in a match box, a tiny piece of string,
some sealing wax and carpet tacks,
a bell that doesn't ring.....


So sweet don't you think? Helps to remind us that the simple pleasures in life are often the ones that brings us the most joy.
I had a visual in my mind of a multitude of flowers cascading out of a denim pocket, so I sketched my idea and used that as my starting point.  Here's the sketch I made.


I managed to take a few more pictures during the process this time, which is going to make this post a long one, so I should apologise now, but I hope you stick with it till the end. ;) 
 I started by covering the canvas in dressmaking tissue paper and then added acrylic paints in a rainbow spectrum.
As is often the case I could have stopped right here because I really liked how it looked at this stage, 
but I knew I had to keep adding more texture.


I had an idea of adding some white into the rainbow for some contrast so I used
this metal stylus- I think its a tool you use for paper tole shaping, only i've never used it for that!
Anyhow I used it to dip into white paint and flicked it from the centre of the canvas outwards. I loved how it added some movement.


Even after adding the white paint I thought the base of the canvas still needed more. 
So thinking along the lines of texture I added strips of surgical gauze and random 
letter stickers.  Then of course I needed to colour the gauze and stickers the appropriate rainbow colour!
You see how easy it is to just keep adding more and more layers, well for me anyway. LOL


Next came all the beautiful rosebuds, from D'lish scraps I created a vine with each colour by twisting the wire stems around each other. The chipboard flourishes are from 2Crafty Chipboard. You can see in the picture below all the chipboard is still raw at this stage, I ended up painting the flourishes white and then coating them with clear distress stickles.  I tucked them into a denim pocket I had cut off a pair of old shorts.  I also added some rub ons and texture stamps at this stage as well.


Here's a close up of the rosebuds, did I say how much I love these? lol


By this stage I was almost done but I needed something to cover the gap where 
all the flower stems met at the top of the pocket. Searching through my flower stash I came across this
Prima beauty and all of a sudden it was done!


I added my journalling which I had simply reworded from the poem and then I sprayed the whole canvas with iridescent gold glimmermist so there is a lovely shimmer to the whole thing.


I hope you've enjoyed this post it's been fun to go back over the process I used in creating it.
and I hope it wasn't too long!!

So that's two of the masters projects down and two to go. The first one's here incase you missed it.
Next week I'll share the multiphoto layout which I really struggled with the most!
Cheers. 
Leonie :)